REVIEW · QUEENSTOWN
From Queenstown: Franz Josef Glacier Hike & Scenic Flight
Book on GetYourGuide →Operated by True South Flights · Bookable on GetYourGuide
A glacier trip by plane and helicopter? Now that is a great plan. From Queenstown you’ll fly south in a modern aircraft, then switch to a helicopter for the landing and the walk on the ice.
I especially like two things: the big-window views during the scenic flight (with pilot commentary) and the chance to hike with a guide on the glacier with proper gear. In the reviews I saw, pilot Lily and guide Sarah stood out for making people feel safe and looked after, not rushed.
One thing to think about: this isn’t a casual stroll. It’s a two-hour glacier hike with crampons, and the tour has weight, age, and fitness limits—so if that sounds stressful, it might be better to choose an easier sightseeing option first.
In This Review
- Key Points You’ll Actually Care About
- The Route: Queenstown to Franz Josef by Air (and Why It’s Worth It)
- Weather Flexibility: Franz Josef vs. Tasman Glacier
- Helicopter Flights: The Crevasses You See From Above
- Landing on the Glacier: Crampons, Layers, and a Quick Reality Check
- The Two-Hour Hike: Ice Caves and an Ever-Changing Surface
- What the Day Feels Like: Timing, Transfers, and Not Losing Your Focus
- Price and Value: $1,015 per Person, and What You’re Buying
- Who Should Book, and Who Might Want a Different Option
- Should You Book This Queenstown Glacier Hike & Scenic Flight?
- FAQ
- How long is the Queenstown to Franz Josef Glacier trip?
- Do I need to hike, or is it mostly flights?
- What happens if the weather is poor?
- What gear is included, and what should I bring?
- Are jeans allowed?
- Is there a weight limit?
Key Points You’ll Actually Care About
- Return scenic flights from Queenstown to Franz Josef, with pilot commentary to help you read what you’re seeing
- Helicopter time before and after the hike, so you get close to crevasses and icefalls
- A guided, two-hour glacier trek with crampons, waterproof clothing, and a focus on safety
- Weather-flexible glacier choice, with the option to see Franz Josef or Tasman Glacier
- Real clothing rules (no jeans, bring warm layers), which makes the day feel more organized than most
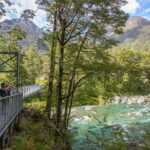
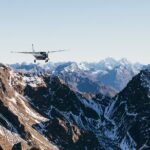
The Route: Queenstown to Franz Josef by Air (and Why It’s Worth It)
This trip is built around one idea: you’re far from Franz Josef, so the fastest way to get there is also the most fun way to see the scenery. You start at True South Flights near Queenstown Airport, then head into the air for a round-trip scenic flight that includes pilot commentary.
The Southern Alps are the star of the show before you ever step onto ice. On the way, you’ll fly over an area known for over 3,000 small glaciers, which helps explain why this corner of New Zealand is so ice-heavy. It’s not just one big glacier. It’s a whole system of frozen rivers and ice fragments, stacked in the mountains.
If you like learning as you travel, the pilot commentary is a real perk. It turns the flight from just a transfer into part of the experience. You’ll also get a sense of scale—how the mountains shape the glaciers, and how the weather changes things quickly.
One practical note: this is a 390-minute day. You’re not spending it trudging around town. You’re spending it strapped in, suited up, and going from vehicle to vehicle. That’s the trade for getting maximum glacier time without losing your whole day to driving.
You can also read our reviews of more hiking tours in Queenstown
Weather Flexibility: Franz Josef vs. Tasman Glacier
New Zealand weather has a sense of humor, and this tour plans for it. You’re set up to visit Franz Josef Glacier on the west side, but the experience can be adjusted so you can instead fly and go onto Tasman Glacier on the east side if conditions don’t cooperate.
That matters because on glacier days, the goal isn’t just to be in the area—it’s to actually get on the ice safely. Having that flexibility means you’re less likely to end up with a plan that feels like a consolation prize. You check in at the relevant glacier setup when you arrive, then move on to the helicopter portion.
What I like about this approach is that it treats the glaciers like living terrain, not a fixed postcard. The day’s “best option” is based on conditions, not on a rigid script. You still get the same core elements: flights, a guided trek, and that close-up view of glacier features.
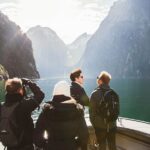
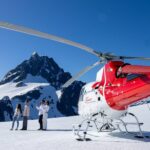
Helicopter Flights: The Crevasses You See From Above
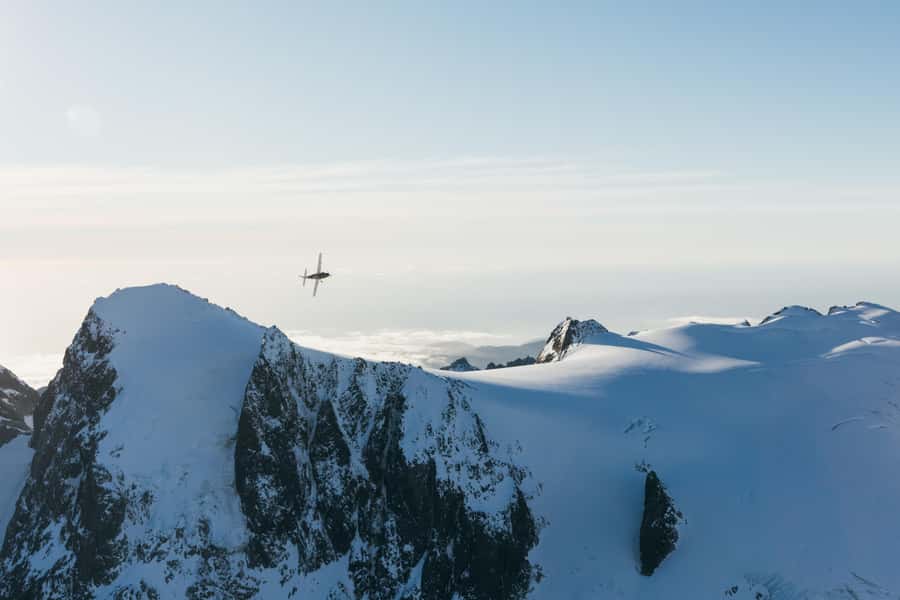
After the plane portion, you’ll switch to the helicopter. In the schedule, you’ll spend around 10 minutes in the helicopter on the Franz Josef side, with another short ride back afterward. Even though it’s brief, that helicopter segment changes the whole feel of the day.
Before you fly, there’s a safety briefing and equipment handout. Then you go up over glacial terrain where crevasses and icefalls become obvious patterns rather than vague shapes. You can’t fake this kind of view. From the air, you start to understand how glacier ice moves and breaks.
If conditions point you toward Tasman Glacier instead, the helicopter goes over the Tasman Terminal Lake area and lands for a glacier experience there. Either way, you’re getting the “big picture” from above, then dropping into the “up close” part.
This is also where the day gets emotional for a lot of people. Not in a cheesy way. Just because seeing deep ice and fractured icefalls makes your brain go quiet for a minute. One of the strongest themes in the feedback I read was that the pilots and guide explained what was happening and kept the tone calm—so the experience felt safe rather than scary.
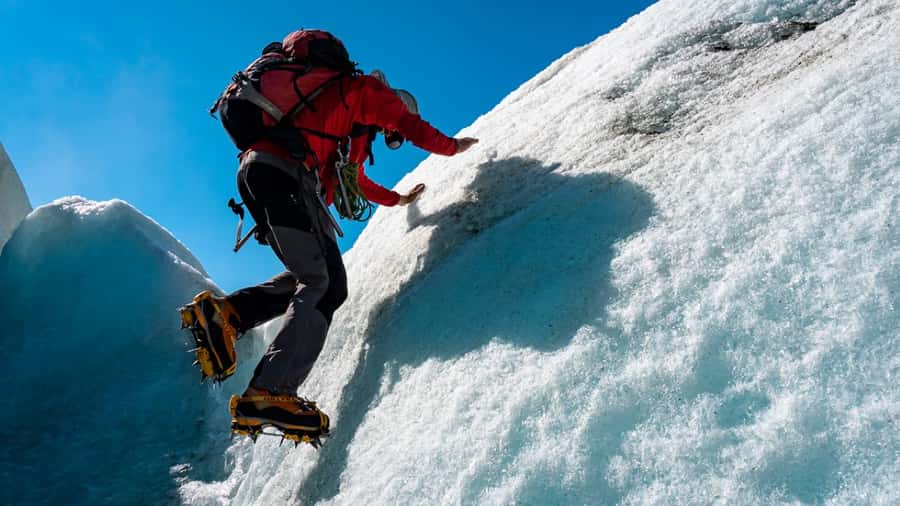
Landing on the Glacier: Crampons, Layers, and a Quick Reality Check
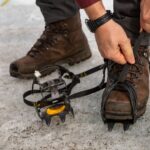
Once you land, the trek starts with getting fitted. You’ll be fitted with crampons, plus waterproof pants and a jacket. The idea is simple: you’re walking on a surface that can be slippery, uneven, and unforgiving if you’re underdressed.
You’ll also hear a briefing about how to walk, what to avoid, and where you’ll be guided. This matters because glacier hiking is not like hiking in dirt. Your steps are planned. Your pace is guided. And the equipment is part of how you stay balanced.
I’m glad the tour supplies specialist gear. It takes away the guesswork of what to buy for one trip. You still need to bring your own clothing layers and essentials, though, and the “don’t bring jeans” rule is more important than it sounds. Jeans are bulky, slow-drying, and not what you want when you’re dealing with cold and wet.
For what to bring, think warm and layered: sunglasses and a camera are useful because you’ll want to capture the views from both the plane and helicopter, but your focus will still be the real-time experience. The tour also asks for a face covering, and recommends warm layers, sunscreen, a small water bottle, and a small snack.
And yes, there are restrictions: no bags, no selfie sticks, no vaping, and no tablets/iPads. The reason is partly comfort and partly keeping your hands and gear manageable on the ice.
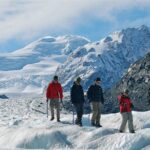
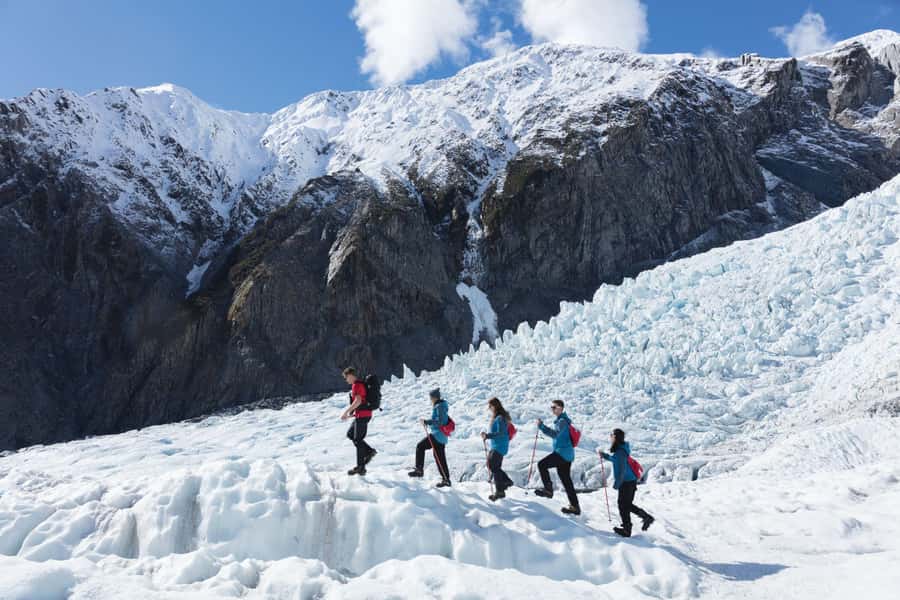
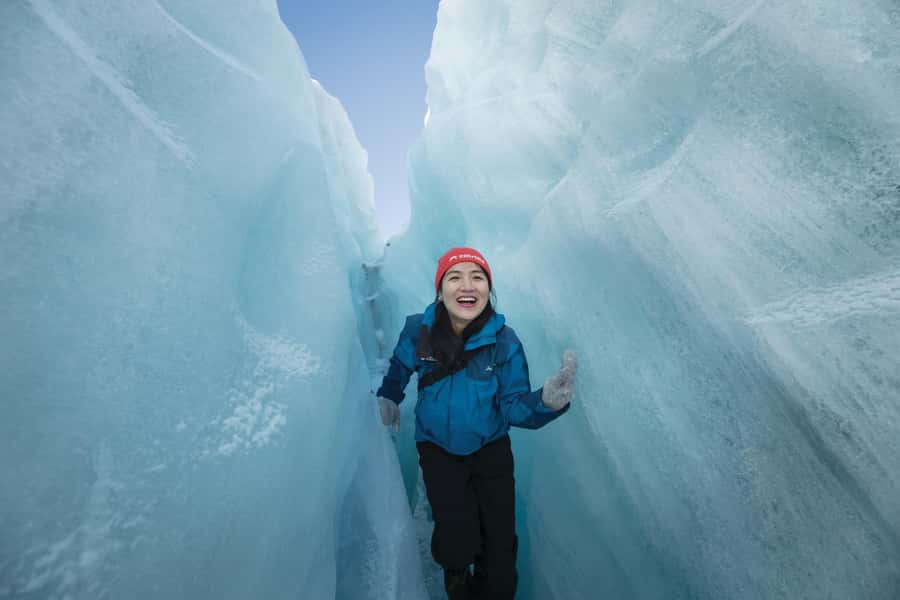
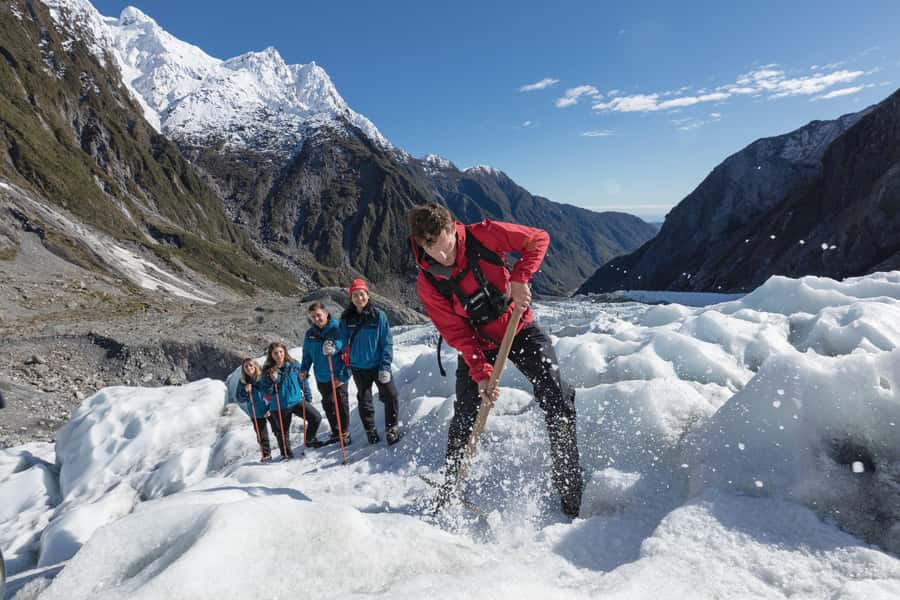
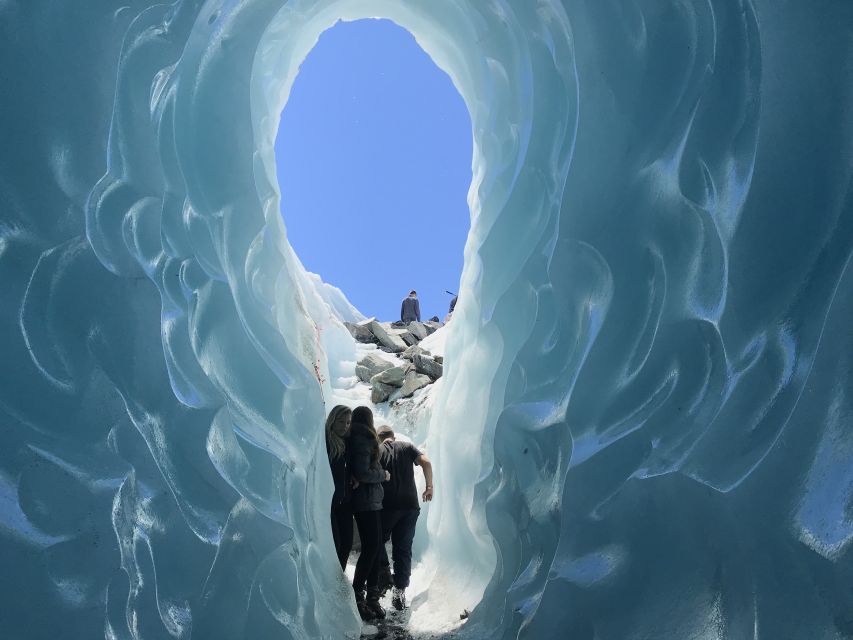
The Two-Hour Hike: Ice Caves and an Ever-Changing Surface
This is the heart of the day: a two-hour glacier hiking experience with your guide. You’ll go out to a deep part of the glacier via the helicopter insertion and walk with crampons, exploring the ice features up close.
One of the coolest elements listed is the chance to explore ice caves. That’s not a museum stop. It’s a real glacier feature shaped by ice movement, melt, and refreezing. The geometry can shift, and what you see may not match what someone saw on a different day, even if it’s the same location name.
You’ll also see the natural, ever-changing qualities of the glacier. It’s not just big ice. It’s ice with texture: cracks, melt patterns, and the marks of how the glacier feeds itself over time. A guide helps translate what you’re looking at so it clicks faster than just staring and guessing.
Fitness matters here. The tour isn’t positioned for low-fitness guests, and it’s not suitable for people with mobility impairments or wheelchair users. It also isn’t for kids under 10. If you can hike on uneven terrain for a couple of hours and keep your balance, you’re likely in the right zone.
From the feedback I read, people kept mentioning safety and feeling looked after the whole time. That’s exactly what you want with ice travel—clear instructions, calm guidance, and gear that fits correctly.


What the Day Feels Like: Timing, Transfers, and Not Losing Your Focus
You’re in the air and on the ice for most of the day, and that can be a good thing if you hate wasting time. The tour runs about 390 minutes, so plan your Queenstown day around it. It’s not a quick add-on between meals.
The flow usually goes like this: check in at the office about 30 minutes before departure, park near the New World area and walk to the building, then meet your group. From there, you’re transferring to vehicles, then boarding the plane for the scenic legs, then switching to the helicopter for the landing.
On arrival, you get a safety briefing and equipment handout. That part is more than formality. It sets the tone for the hike and helps you avoid the classic beginner issues like not understanding how crampons should feel on your feet.
When you’re on the glacier, focus beats multitasking. Bring your camera, sure. But don’t rush photos like you’re in a race. This is the kind of place where the best shots come when you slow down and let the guide point things out.
Also, food and drinks are not included. You’ll want to bring what you need. Think snack that won’t freeze hard and won’t crumble in a jacket pocket. In a day built on cold air, a little planning keeps you from getting cranky later.
Price and Value: $1,015 per Person, and What You’re Buying
At $1,015 per person, this is not a budget activity. So here’s the real value question: what does that price buy you that you can’t easily replicate?
You’re paying for two kinds of access:
1) Scenic flight time from Queenstown with pilot commentary
2) Helicopter access to the glacier area, plus the guided hike with specialist gear
A standard drive-and-view glacier day can be pretty, but you usually get limited views from outside the safety zone. With this format, you get multiple angles and an actual on-ice experience. Helicopter flights cost money, and they also shorten the distance between you and the glacier features that would otherwise be out of reach.
The included gear is another value factor. Cramp-ons, waterproof pants, and jackets aren’t things you want to buy for one trip and then leave behind. The two-hour guide-led hike is built around safety and equipment fitting, not just sightseeing.
Is it worth it? If you’re going to spend real money anywhere on the South Island, this is the type of experience that tends to feel like a full “ticketed moment”—a day you remember because you actually stepped onto the ice, not just looked at it.
If you’re mainly after photos and you’re okay with viewpoints from a distance, there are cheaper glacier options. But if you want the glacier as your activity, not your scenery, this is a strong fit.
Who Should Book, and Who Might Want a Different Option
This tour is a great match if you:
- Want a bucket-list glacier hike and you’re comfortable with a guided pace
- Like big views and you don’t mind being in the air for much of the day
- Have the right fitness for two hours on uneven, cold terrain
- Are ready to follow equipment and clothing rules closely
It’s not for people who:
- Need mobility support or use wheelchairs
- Have low fitness for an on-ice hike
- Fall outside the weight guidelines (under 30 kg or over 115 kg)
- Are under 10 years old
One more honest consideration: the rules about packing matter. No bags, and items must fit in a small 2-liter waist bag. If you travel with lots of gear and like to spread out your stuff, plan to travel light for this one.
Should You Book This Queenstown Glacier Hike & Scenic Flight?
Book it if you want to make one South Island day count. This is the rare combo of long-distance glacier access plus on-ice hiking, delivered with plane views, a helicopter landing, and a guide-led trek with crampons and proper cold-weather gear.
Skip it (or consider a lighter option) if you’re not confident about balance and fitness on cold, uneven ground, or if the restrictions on weight, age, and mobility make you feel like you’re gambling. And if you hate gear rules, remember: glacier safety depends on the right setup, so you’ll be expected to follow directions.
If you’re on track physically and you want the glacier as the main event, this is a high-impact day. The kind that turns Queenstown from a base into the launch point for something truly icy.
FAQ
How long is the Queenstown to Franz Josef Glacier trip?
The total duration is 390 minutes, so plan for about six and a half hours from start to finish.
Do I need to hike, or is it mostly flights?
There is a glacier hike as part of the experience. You’ll get about a two-hour guided glacier hiking time with crampons.
What happens if the weather is poor?
The experience includes flexibility to see either Franz Josef Glacier or the Tasman Glacier depending on conditions. You check in for the glacier tour you’ll be operating on when you arrive.
What gear is included, and what should I bring?
The tour includes crampons and cold-weather gear like waterproof pants and jackets. You should bring long-sleeved layers, long pants (no jeans), closed-toe shoes, sunglasses, sunscreen, and food and drinks since meals aren’t included.
Are jeans allowed?
No. Jeans are not allowed on this tour.
Is there a weight limit?
Yes. Passengers under 30 kg and over 115 kg are not able to participate due to safety regulations and comfort.