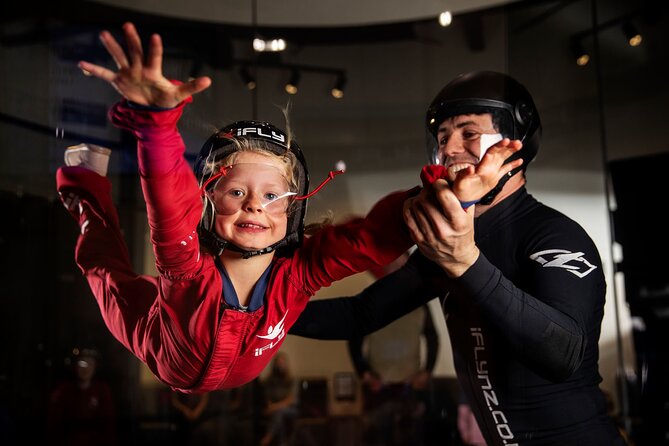
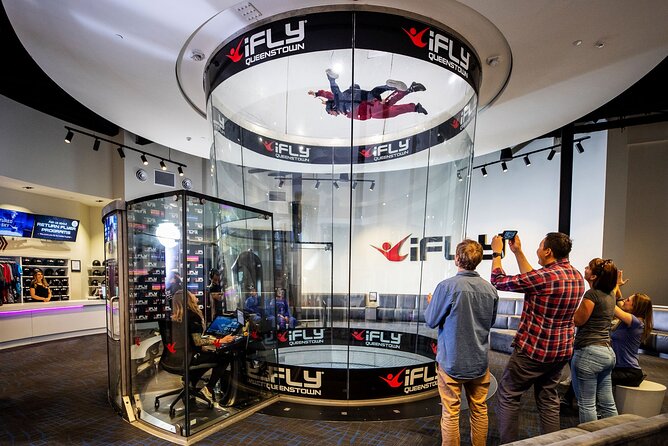
Your first free-fall starts with no plane. iFLY Queenstown runs an indoor wind-tunnel setup under Queenstown’s Skyline Gondola, so you get the feeling of floating even when the weather turns. The whole experience is built for first-timers, with full equipment provided right on site.
I love how gear is included from the start. You’re kitted with a full flight suit, plus a helmet and goggles, so you can focus on flying instead of figuring out what to wear. I also love the coaching style: instructors are certified by the International Bodyflight Association, and they run a safety briefing plus hands-on training on body position and signals.
One consideration: the time in the air is brief. You get two 60-second flights, so the value is in the full process of training, coaching, and the sensation, not in long airtime.
In This Review
- Key things to know before you fly
- Queenstown’s Skyline-area wind tunnel: where the flight starts
- Gear, training, and safety: how you get ready to feel free-fall
- Your two 60-second flights: what happens inside the tunnel
- 1) Check-in, briefing, and getting kitted
- 2) Body positioning and signal training
- 3) Flight one: the first taste of floating
- 4) Brief reset, then flight two
- 5) Video and optional add-ons
- Price and value: is $86.26 worth your money?
- Who should book this (and who should think twice)
- Who should skip it or ask questions first
- Rainy-day logistics: timing, getting there, and what to wear
- Should you book iFLY Queenstown?
- FAQ
- Where is the meeting point for iFLY Queenstown?
- How long does the experience take?
- How many flights do I get, and how long are they?
- What gear is included?
- Is there a weight limit?
- Is it suitable for kids and total beginners?
- Is it recommended if I have a history of shoulder dislocations?
- Can I cancel for free?
Key things to know before you fly
- Location under Skyline Gondola: easy to find, and it turns a rainy day into a real plan.
- All the basic gear included: flight suit, helmet, and goggles are provided.
- Certified coaching focus: safety briefing plus training on body position and hand signals.
- Two flights, not one: you’ll do two separate one-minute runs.
- Small group size: up to 8 travelers, which usually keeps the flow smooth.
- Strict limits keep it safe: you must weigh less than 125kg, and shoulder dislocations mean you should avoid it.
Queenstown’s Skyline-area wind tunnel: where the flight starts
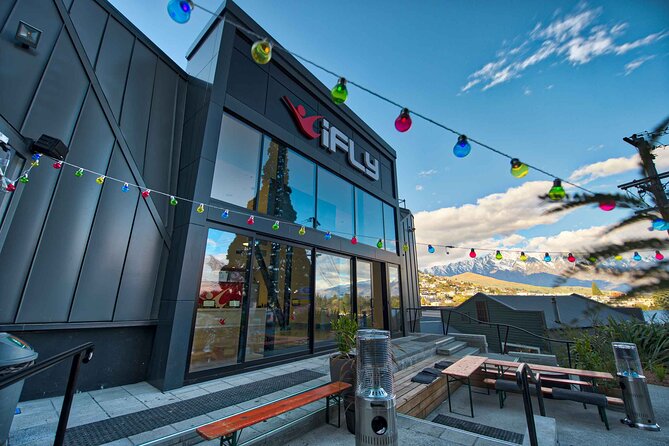
Queenstown already has a talent for turning big ideas into doable experiences. iFLY’s wind tunnel is one of those. The big practical win is the location: it’s directly beneath Queenstown’s Skyline Gondola. That matters because it’s a simple start to your day, not a scavenger hunt through parking lots and side streets.
I like that the meeting point is straightforward. You meet at 27 Brecon Street in Queenstown, and the activity ends back at the same point. No hotel pickup, so you’ll want to plan your own transport and timing around the short, self-contained session.
This is the kind of activity that fits almost any itinerary. You can slot it into a rainy afternoon. You can also do it on a lighter day when you don’t want to spend hours commuting. And because it’s an indoor setup, you’re not stuck waiting for weather to behave.
You can also read our reviews of more tours and experiences in Queenstown.


Gear, training, and safety: how you get ready to feel free-fall
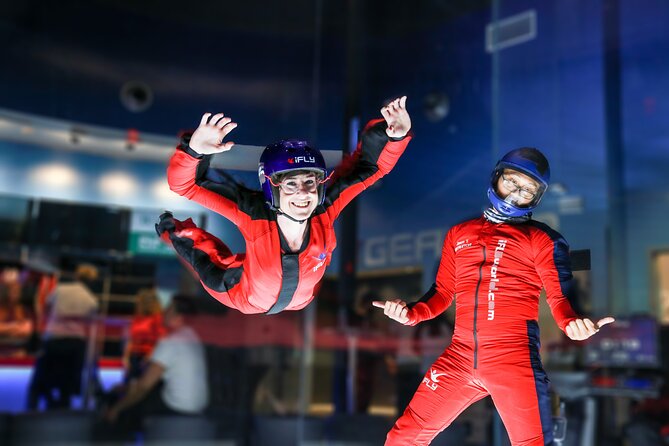
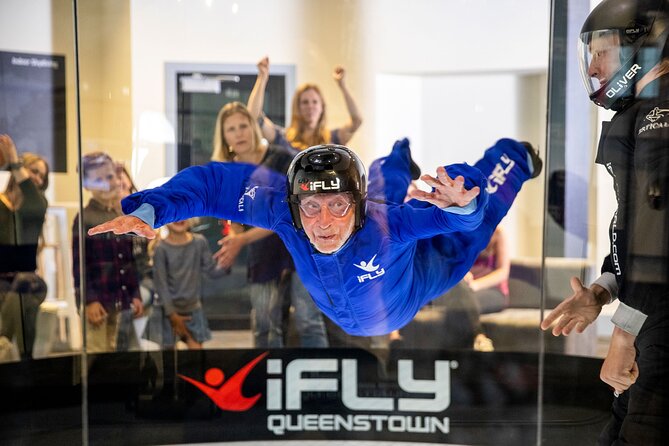
The experience is designed for people who want the flying feeling without the leap-from-a-plane part. You get the sensation of free-fall in an air cushion, inside a controlled wind tunnel. There’s no parachute, no open door, no jump. That alone lowers the mental barrier for a lot of first-timers.
Before you step into the tunnel, you’ll go through a safety briefing & orientation session. Then you’ll be fitted with your full equipment: a full body flight suit, plus helmet and goggles. I like this approach because it’s one less thing to think about. You also don’t need to bring specialized gear. Show up ready for the wind-tunnel vibe.
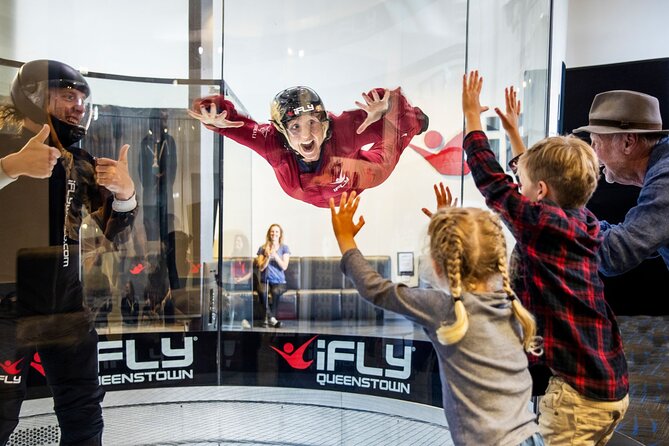
The coaching is the other half of what makes this work. You’ll get instruction on body positioning and the hand signals your instructor uses during the flight. The instructors are certified by the International Bodyflight Association, and safety is their number one priority.
In plain terms, that means you’re not just handed a helmet and told to go have fun. You’re guided. You learn what to do with your body so the airflow works for you, not against you. And you learn how to communicate with your instructor using the signals during the flight.
If you’re anxious about trying something new, this is one of the easiest ways to build confidence. Not because it’s scary-free, but because the system is structured.
Your two 60-second flights: what happens inside the tunnel
The schedule is short by design. The full experience runs about 1 hour, but you’ll get two flights, each about 60 seconds. That includes the prep, the training, and the switch from one run to the next.
Here’s what you can expect in the flow.
1) Check-in, briefing, and getting kitted
You’ll arrive at the meeting point, then get oriented. The briefing covers safety and what to do during the flights. After that, you’ll suit up with your helmet, goggles, and flight suit. Because everything is included, you’re not juggling gear choices or figuring out sizing at home.
The practical upside: you can wear whatever you’re comfortable in, and the staff handles the wind-tunnel setup.
2) Body positioning and signal training
Next comes the training portion. Your flight instructor will show you what to focus on for your body position during the flight, plus how to use the hand signals. You’ll get tips that help your body react correctly to the airflow.
This is where I think the experience earns its beginner-friendly reputation. If you’ve never done anything like this, you still get a clear checklist to follow. The instructor isn’t just reacting in the moment; they’re teaching you the basics so your flight feels smoother and more controlled.


3) Flight one: the first taste of floating
Then you go into the tunnel for your first one-minute flight. You’ll feel the sensation of free-fall and floating on the air cushion created by the wind. Even though it’s only a minute, it’s usually long enough for your brain to go from curiosity to pure focus.
Expect to feel the airflow. It can be intense at first, but the structure and coaching help you find the right body position fast.
4) Brief reset, then flight two
After the first run, you’ll reset and prepare for the second flight. This second chance is valuable because you can apply what you learned in flight one. You’re not starting from scratch.
The two-flight format is also one reason the overall experience feels complete. You get a first try, then a chance to improve your control and make the second run feel better.
5) Video and optional add-ons
From the review feedback, one thing many people enjoy is receiving a video of their flight time. There can also be optional add-ons during the experience, and one reviewer wished they had known about those upfront. So if you like to control spending, ask what’s included versus what’s optional before you commit.
Price and value: is $86.26 worth your money?
At $86.26 per person, this is not a budget activity. But it’s also not priced like a half-day attraction. The value comes down to what you’re buying: a coached, safety-first wind-tunnel flight with two separate one-minute runs, plus all the necessary gear.
Here’s how to think about value in a way that makes sense for you:
- You get the basics handled: suit, helmet, goggles, briefing, and instructor time are included. That reduces surprise costs.
- You get more than one run: two flights means your first experience doesn’t have to be perfect. You can learn and then reapply.
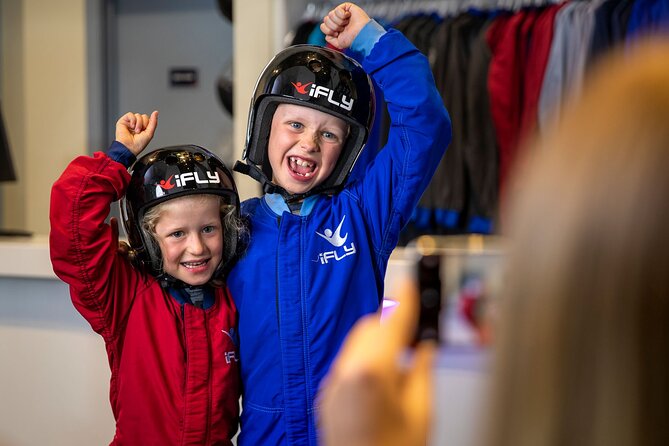
- It’s beginner-ready: the training is built for total beginners and kids, so you don’t need prior experience to enjoy it.
- Group size stays small: up to 8 travelers helps keep attention and transitions manageable.
What might feel less “value-like” is the short time in the air. Two minutes total airborne time means you won’t leave feeling like you lived in the tunnel. But most people aren’t actually paying for airtime. They’re paying for the feeling plus the guided setup that lets you reach it quickly.
If you’re someone who wants long thrill rides, you might feel the time limit. If you want a bucket-list sensation that’s safe, coached, and easy to schedule, the price is easier to justify.
Who should book this (and who should think twice)
This is a good fit if:
- You want an exciting rainy day option in Queenstown.
- You’re a total beginner who wants coaching rather than figuring things out alone.
- You’re traveling with kids and you want something designed to work for them.
- You’re curious about skydiving sensations but don’t want to jump out of a plane.
It’s also a great option if you like structured experiences. You’ll go through safety briefing, get fitted, learn body position basics, and then fly.
Who should skip it or ask questions first
A couple of key limits are important.
- Weight limit: participants must weigh less than 125kg to prevent dangerous wind speeds.
- Shoulder concerns: it’s not recommended for travelers with previous shoulder dislocations.
If either of those applies to you, ask before booking so you don’t show up for something that isn’t right for your body.
Rainy-day logistics: timing, getting there, and what to wear
Because this is indoor, it plays nicely with New Zealand weather. Queenstown can be unpredictable, and this plan doesn’t collapse if clouds roll in.
The whole experience is about 1 hour. That’s helpful if your day is packed with other stops and you need something that won’t swallow your schedule.
You meet at 27 Brecon Street, and it ends there. So plan a short walk or quick transport from where you’re staying. It’s near public transportation, which is handy if you’re not driving.
What to wear isn’t listed in the details provided, so I’ll keep it practical: choose comfortable clothes you can move in, and remember you’ll be wearing a flight suit over whatever you have on. You’ll also be wearing helmet and goggles, so don’t bring anything precious to the wind.
If you’re bringing kids, aim to arrive a little calm and ready. Even though this is beginner-friendly, the briefing and gear fitting take attention. A steady start helps everyone enjoy the flight more.
Should you book iFLY Queenstown?
I’d book it if you want a safe, coached way to experience the sensation of free-fall in Queenstown, especially on a rainy day. The two flights, the included gear, the certified instruction, and the small group setup all point to an experience designed for first-timers. It’s also an easy sell for kids and beginners because you’re trained, not thrown in.
I’d think twice if you’re chasing long airtime or if the idea of learning body positioning from scratch stresses you out. Also watch for optional add-ons, and ask what’s included in your ticket versus what’s extra so you can choose at your pace.
If you’re on the fence, here’s my simple test: if you can get excited about trying something new and following instructions, this is a high-likelihood win. If you need lots of time in the air to feel satisfied, consider pairing it with another Queenstown activity so the day still feels full.
FAQ
Where is the meeting point for iFLY Queenstown?
You’ll meet at 27 Brecon Street, Queenstown 9300, New Zealand. The activity also ends back at the same meeting point.
How long does the experience take?
The total experience time is about 1 hour (approx.).
How many flights do I get, and how long are they?
You get 2 flights per person, and each flight lasts 60 seconds.
What gear is included?
The tour includes a full body flight suit, a helmet, and goggles. You also get a safety briefing & orientation session and an instructor.
Is there a weight limit?
Yes. To prevent dangerous wind speeds, participants must weigh less than 125kg.
Is it suitable for kids and total beginners?
Yes. It’s described as suitable for kids and total beginners, with training and safety instruction provided.
Is it recommended if I have a history of shoulder dislocations?
It is not recommended for travelers with previous shoulder dislocations.
Can I cancel for free?
Yes. You can cancel up to 24 hours in advance for a full refund.