REVIEW · QUEENSTOWN
Full Day Queenstown & Southern Lakes Private Photography Tour
Book on Viator →Operated by Remarkable Imagery Photography Tours · Bookable on Viator
Want better photos fast?
This full-day Queenstown and Southern Lakes private photo tour uses a real, working-pro approach: you start early for morning light and then get hands-on instruction on how to use your camera beyond auto. I like that the day pairs scenery like Skippers Canyon and Lake Wakatipu with practical coaching, and I also like that the route is flexible enough to steer you toward what you personally want—waterfalls, gold-mining history, rugged canyons, or The Lord of the Rings filming locations.
One possible drawback: it’s a 9-hour day, so you’ll spend real time in the vehicle, and lunch is not included. If you’re not into longer scenic drives—or you already hate thinking about manual settings—this may feel like more effort than payoff.
In This Review
- Key takeaways before you go
- First light around Queenstown: why the start time matters
- Camera coaching that works for both SLR and compact users
- Skippers Saddle and Skippers Canyon: learning framing on vertigo roads
- Choosing the West: Glenorchy, Paradise, Kinloch, waterfalls, and mines
- Choosing the East: Arrowtown heritage, Gibbston Valley wine country, Kawarau Gorge
- Choosing the South: Kingston, the Remarkables, and old steam train country
- Choosing the North: Crown Range to Wanaka and Mount Aspiring views
- Price and what you get: value of a 9-hour pro-led private day
- Weather-proofing: shooting in all conditions
- Who should book this tour (and who should think twice)
- Should you book the Full Day Queenstown & Southern Lakes Private Photography Tour?
- FAQ
- How long is the Queenstown & Southern Lakes photography tour?
- What time does the tour start, and do you get hotel pickup?
- Do I need any photography experience to join?
- Is lunch included in the price?
- What camera equipment is available for rent?
- Can the route be customized to my interests?
- What kind of vehicle do you use?
- Does the tour run in bad weather?
- Is this a private tour?
- What’s the cancellation policy?
Key takeaways before you go
- Pro-led manual settings: you’ll practice aperture, shutter speed, and ISO so your photos stop feeling random
- Early start for softer light: morning timing is built into the plan for more flattering results
- Route choices based on your interests: West, East, South, or North options change the whole vibe
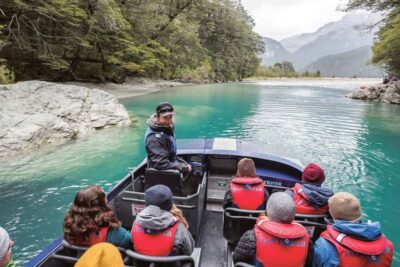
- 4WD comfort for viewpoint access: convenient transport to places you’d likely skip on your own
- Camera rental available: Nikon models can be rented for $25 NZD per day if you want local guidance with a compatible body
First light around Queenstown: why the start time matters
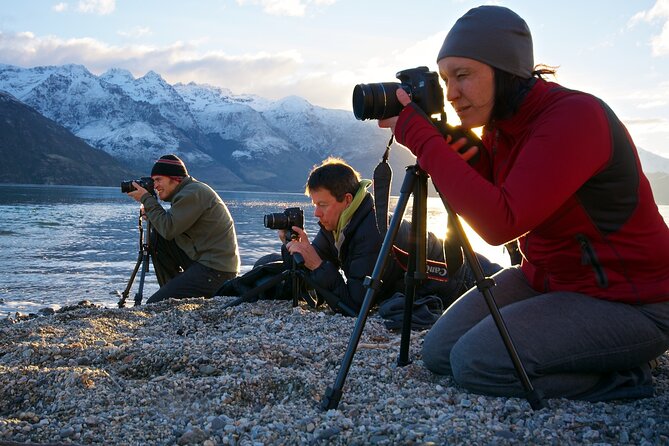
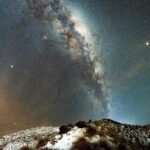
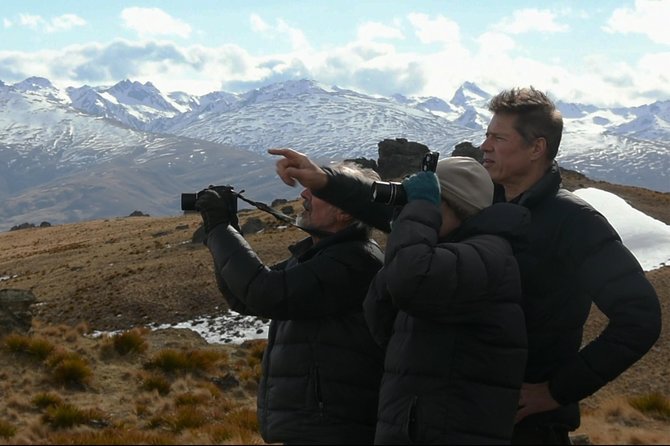
The day kicks off at 8:00am with hotel pickup in Queenstown, Frankton, or Arrowtown, then you head straight into the hills before the day fully warms up. That early timing isn’t just for “pretty pictures.” It’s when shadows are softer and highlights on rock and water are easier to control—exactly the kind of conditions your guide can show you how to work with.
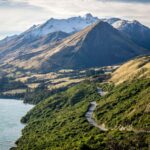
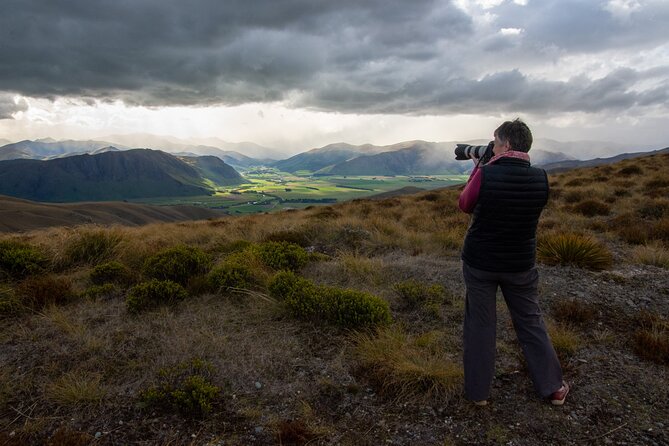
You’ll get to high vantage points over the Wakatipu Basin, with views that include Queenstown, Frankton, and Arrowtown. From there, you’re not only sightseeing—you’re learning how to see a frame. A good coach will help you simplify what you’re looking at: where to put the horizon, how to layer foreground/middle/background, and when to prioritize the town lights versus the mountains.
You can also read our reviews of more private tours in Queenstown

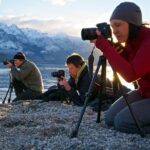
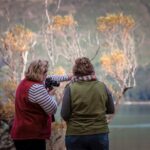
Camera coaching that works for both SLR and compact users
This tour is built for no experience necessary. That matters because many “photo tours” assume you already know how to set exposure. Here, you get real teaching on manual controls—specifically aperture, shutter speed, and ISO—so you can make the camera do what you want.
Even if you’re shooting a digital SLR or a compact, you’ll still benefit from the same core ideas:
- Aperture for depth of field (keeping mountains sharp, blurring water for a calmer look)
- Shutter speed for motion (think waterfalls and river flow)
- ISO for balancing brightness when light changes fast across cliffs and valleys
In the feedback you’ll see guide names like Martin (and sometimes Mark), and the theme is consistent: the instruction is practical, not lecture-y. You’ll also get composition and lighting advice while you’re actively shooting, not after you’re packed back into the car.
If you don’t want to bring your own camera, there’s an option to rent one—Nikon D5100, D5600, or D7200—for $25 NZD per day. It’s not required, but it’s helpful if you want a smoother setup for learning.
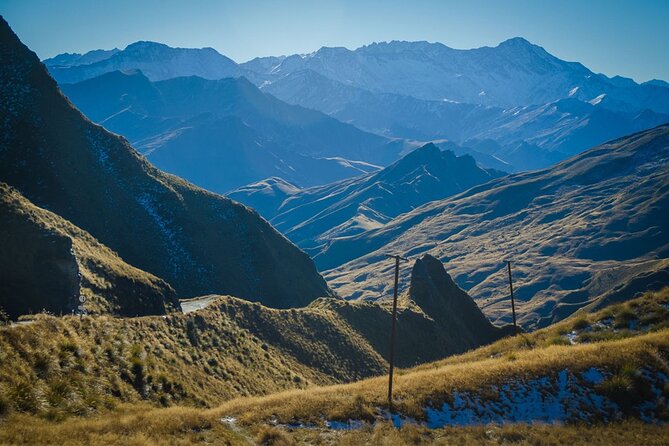
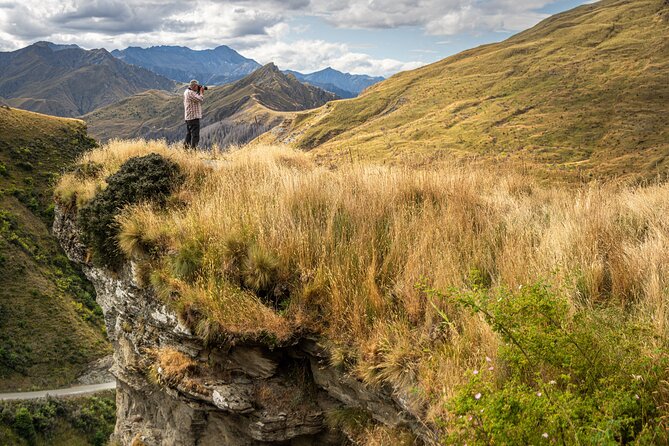
Skippers Saddle and Skippers Canyon: learning framing on vertigo roads
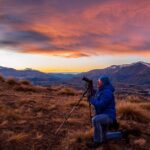
One of the most teachable parts of the day is the drive to viewpoint angles like Skippers Saddle, then the route through the dramatic terrain around Skippers Canyon and Coronet Peak. This is the sort of area where it’s easy to rush and just “snap.” A photo coach slows you down—in a good way.
From the high lookout, you can practice the big basics:
- How to place a subject (Queenstown or a river bend) so it doesn’t fight the mountains
- How to use leading lines from roads and canyon edges
- How to adjust exposure when the scene has both bright sky and darker hills
Skippers Canyon itself is rugged and steep, with a road feel that can make you check your footing even if you’re safely inside the vehicle. That’s part of the attraction: the setting forces more intention. Your guide can help you choose what to emphasize—canyon textures, the curve of the road, or the broader Wakatipu Basin sweep behind it.
Choosing the West: Glenorchy, Paradise, Kinloch, waterfalls, and mines
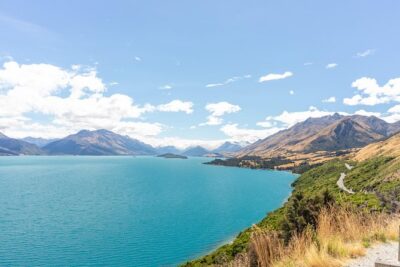
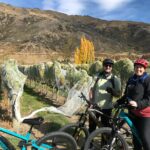
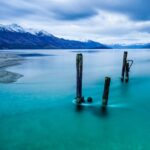
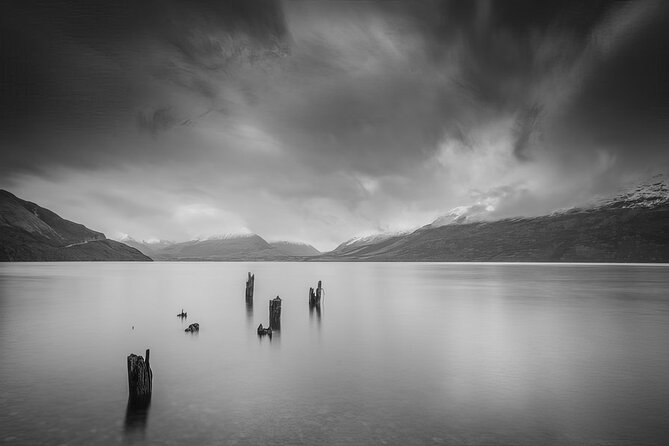
If you like dramatic water and film-location vibes, the West route is a strong match. You could head toward Glenorchy, Paradise, and Kinloch, with chances for waterfalls, views around Lake Wakatipu, and stops related to the region’s gold mining and transport/farming history. It’s also where The Lord of the Rings filming locations around Lake Wakatipu come into the mix.
This direction is especially useful for photographers who want to practice:
- Motion control for waterfalls and rivers (shutter speed decisions)
- Foreground interest, like rocks and river banks, so your shots don’t look flat
- Timing within a day, because cloud cover and light shifts can change the look fast on the water
You’ll also hear about areas like Moke Lake, plus river scenery involving the Dart and Rees Rivers. The practical value here: the guide can show you how a small change in camera position changes the entire image.
Note: lunch is on you. The tour includes time to grab food in a village along the way, but the cost and choice are yours.
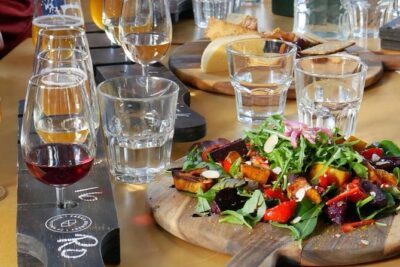
Choosing the East: Arrowtown heritage, Gibbston Valley wine country, Kawarau Gorge
The East route leans into heritage towns, vineyards, and classic Central Otago scenery. You can swing through Arrowtown, then up toward the Crown Range and on into the Gibbston Valley and Cromwell area. If you’re interested in a mix of countryside textures and cultural touchpoints, this is a great option.
East-side scenery also pairs well with photography lessons because you get variety in one day:
- Heritage town textures (useful for sharper detail and balanced exposure)
- Winery-country open views (great for practicing horizon placement)
- Rugged gorge angles around Kawarau Gorge
Kawarau Gorge is particularly good for learning how to shoot “vertical reality” without turning every photo into a confusing mess. A coach will help you simplify the view into something readable: a strong dominant line, a manageable sky portion, and a subject that anchors the frame.
You can also read our reviews of more photography tours in Queenstown
Choosing the South: Kingston, the Remarkables, and old steam train country
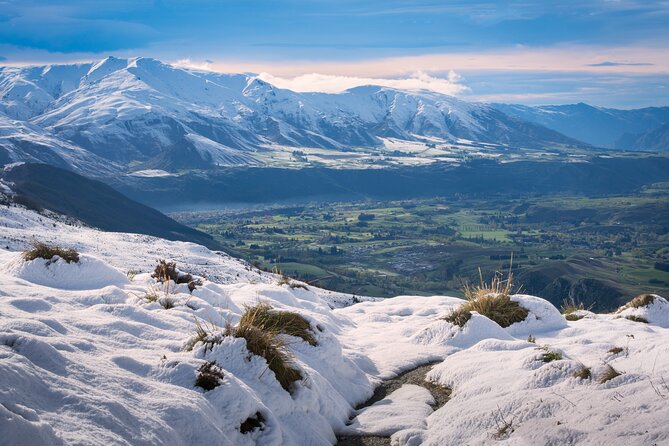
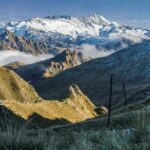
Going South often feels like shifting from “town-country” into big-sky, mountain-weight scenery. You may pass by Kingston and move around the base of the Remarkables Range, with photo chances that include wild alpine tussock and rock tor country.
One of the more distinctive treats here is the mention of an old steam railway / steam train. Even if you’re not a railway fanatic, it’s a useful creative prompt: you can practice photographing heritage objects with surrounding rock and mountains as context.
South routes are also handy if you’re chasing contrast—dark rock shapes against lighter sky, or river and mountain forms that can look totally different from one angle to the next. Your guide can help you decide when to prioritize sharp detail versus mood (and when to stop, because yes, you can over-shoot and still end up with nothing you love).
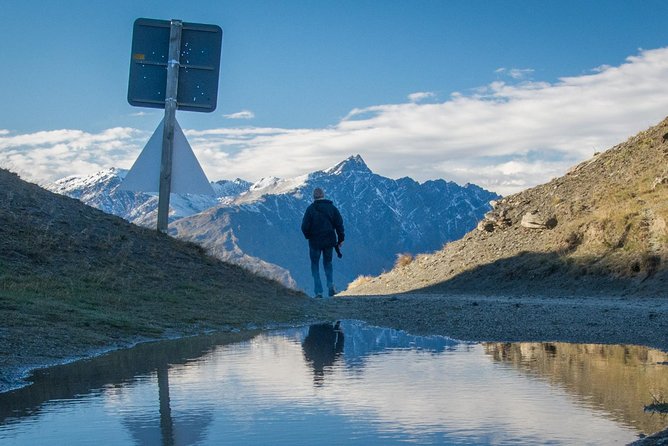
Choosing the North: Crown Range to Wanaka and Mount Aspiring views
The North route pushes toward Wanaka, with road and viewpoint energy that’s very “Southern Alps mood.” You’ll likely cross the Crown Range toward Wanaka, and the day includes views toward Lake Wanaka, Mount Aspiring, and the wider Southern Alps.
This direction is especially good for photographers who want to practice patience. Mountain light changes quickly, and the guide can help you keep working with what you have rather than waiting forever for a perfect cloud that never shows up.
If you’re traveling with someone who isn’t obsessed with camera settings, this is also a smart compromise: the views are the kind where even non-photographers stop talking.
Price and what you get: value of a 9-hour pro-led private day
At $263.74 per person, this tour sits in the “worth it if you use it well” category. Here’s why it can feel like good value:
- You’re not paying only for driving—you’re paying for structured coaching on how to control your images.
- You get hotel pickup and drop-off, plus round-trip transport via a comfortable 4WD vehicle.
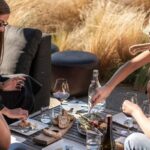
- You get light refreshments, and you’re not stuck trying to figure out where the best viewpoints are on your own.
Private tours can cost more than shared ones, but this is a day where customization matters. If you’re the kind of person who wants waterfalls over vineyards, or LOTR film spots over steam-train scenery, the flexibility helps you get a better result.
What’s not included is also clear: lunch is not included, and if you want to rent a camera it’s $25 NZD per day. When planning your total budget, add lunch plus any extras you want to buy on the road.
Also, the “private” aspect is real. You’re not mixed into a random group. It’s just your party.
Weather-proofing: shooting in all conditions
The tour operates in all weather conditions, and you’ll be told to dress appropriately. That’s more useful than it sounds. Mountain weather can change in minutes, and exposure decisions (especially ISO and shutter speed) become part of the lesson.
Bring layers, and expect that you might shoot in mist or shifting light. That’s not a failure—it’s teaching material. Your guide can help you keep moving toward shots even when the sky isn’t cooperating.
Who should book this tour (and who should think twice)
This private photography tour is ideal if you:
- Want to learn real camera settings without feeling lost
- Prefer a guided route but want it shaped to your interests
- Plan to take more than a dozen photos and actually want them to look intentional
- Are visiting Queenstown with limited time and want to hit multiple Southern Lakes areas in one day
It may be less ideal if you:
- Don’t want an instruction component at all
- Get impatient with a full 9-hour day and lots of viewpoint stops
- Only want one or two “big sights” and would rather drive yourself at a relaxed pace
Should you book the Full Day Queenstown & Southern Lakes Private Photography Tour?
If you’re serious about improving your photos—or you just want to stop relying on luck—this is the kind of day that makes a difference. The early start, the pro-led manual settings coaching, and the flexibility to steer toward waterfalls, gold-mining history, rugged canyons, or The Lord of the Rings filming locations all work together.
Book it if you’ll use the teaching. Skip it if you want a simple sightseeing drive with no photo homework. For most people in Queenstown who care even a little about photography, this is one of the most practical ways to get better results quickly.
FAQ
How long is the Queenstown & Southern Lakes photography tour?
The tour runs for about 9 hours.
What time does the tour start, and do you get hotel pickup?
The tour starts at 8:00am, with pickup offered from Queenstown, Frankton, or Arrowtown hotels. You’re also dropped back at your hotel after the tour.
Do I need any photography experience to join?
No experience is required. The tour is suitable for both digital SLR and compact camera users.
Is lunch included in the price?
No. Lunch is not included, and you’ll have time to buy lunch in a village along the route.
What camera equipment is available for rent?
A Nikon D5100, D5600, or D7200 can be rented for $25 NZD per day if you want one for the day.
Can the route be customized to my interests?
Yes. The itinerary is flexible, and the route depends on your preferences (West, East, South, or North options).
What kind of vehicle do you use?
You travel in a comfortable 4WD vehicle.
Does the tour run in bad weather?
Yes. The tour operates in all weather conditions, and you’ll need to dress appropriately.
Is this a private tour?
Yes. It’s a private tour for small-groups or individuals, and only your group participates.
What’s the cancellation policy?
You can cancel for a full refund up to 24 hours in advance. If you cancel less than 24 hours before the start time, the amount paid is not refunded.